Design Blog

Need some ideas? Maybe a little designer advice? Or a lot of artful inspiration? Check out our design blog below to find out what how, what’s not, and how it’s done.

How to Make Your Space Warm & Welcoming

Have you noticed how some spaces exude a sense of welcome? What is it about them that invites people to linger? And what is it that keeps them coming back? As a designer, my job is to ask these questions and in my experience the answer is different for every client.

Regardless of what “home” means, there are likely some common denominators: warm, cozy, comfortable, relaxing, you get the picture. There is no magic pill to achieving a sense of warmth in the home, but there are strategic ways to contribute to this effortlessly deliberate, totally unmistakable look and feel. Here is how to turn up the heat, to help any space feel more like “home.”

#1 Physical Warmth

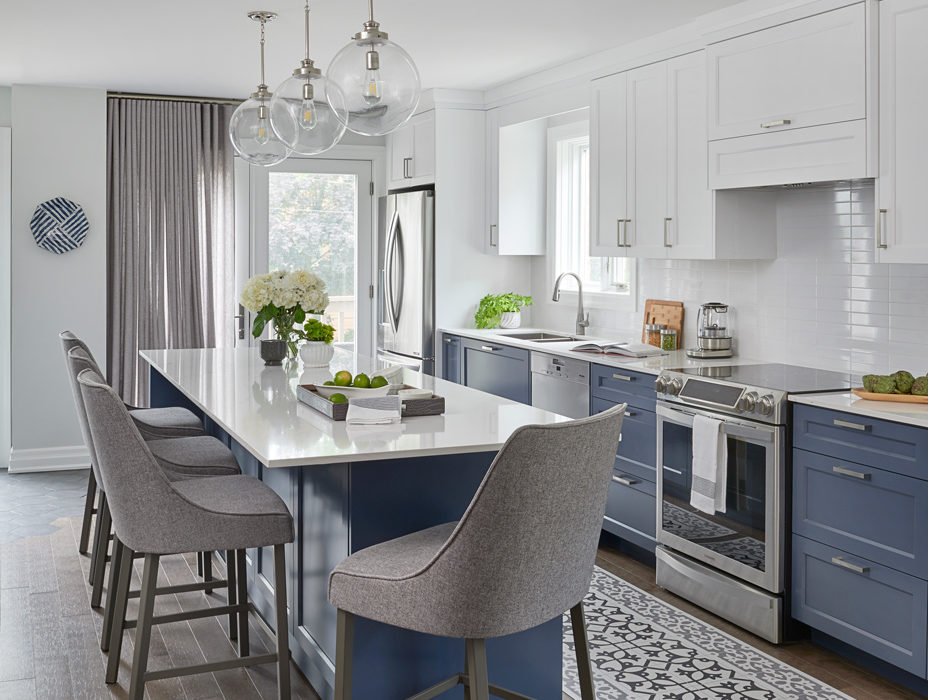
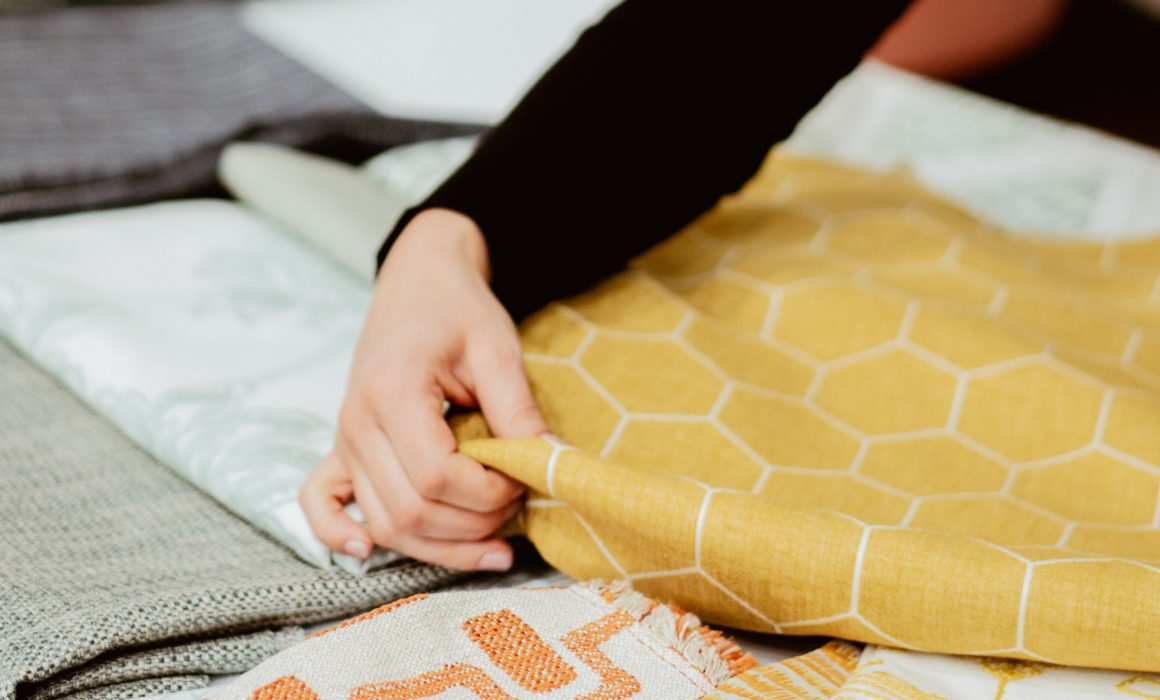
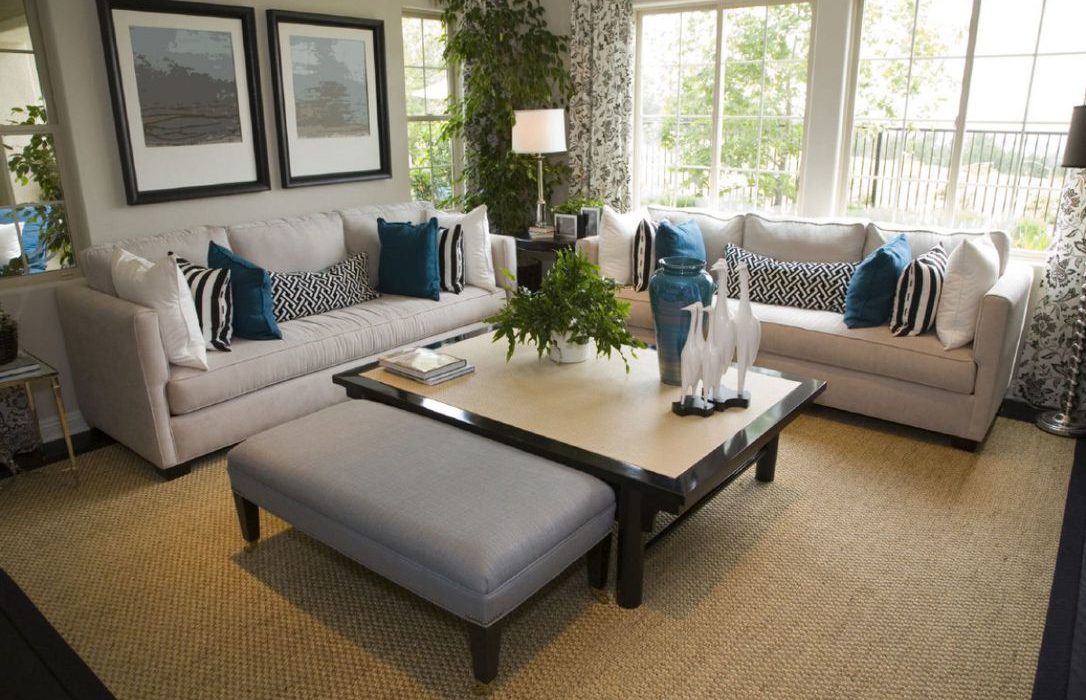
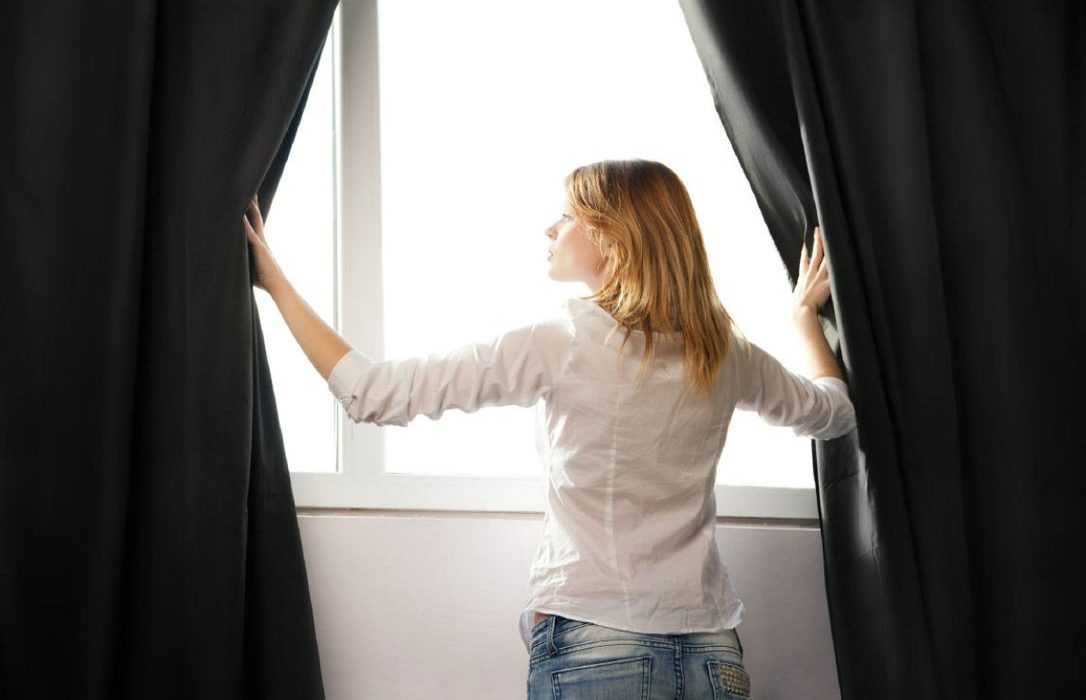
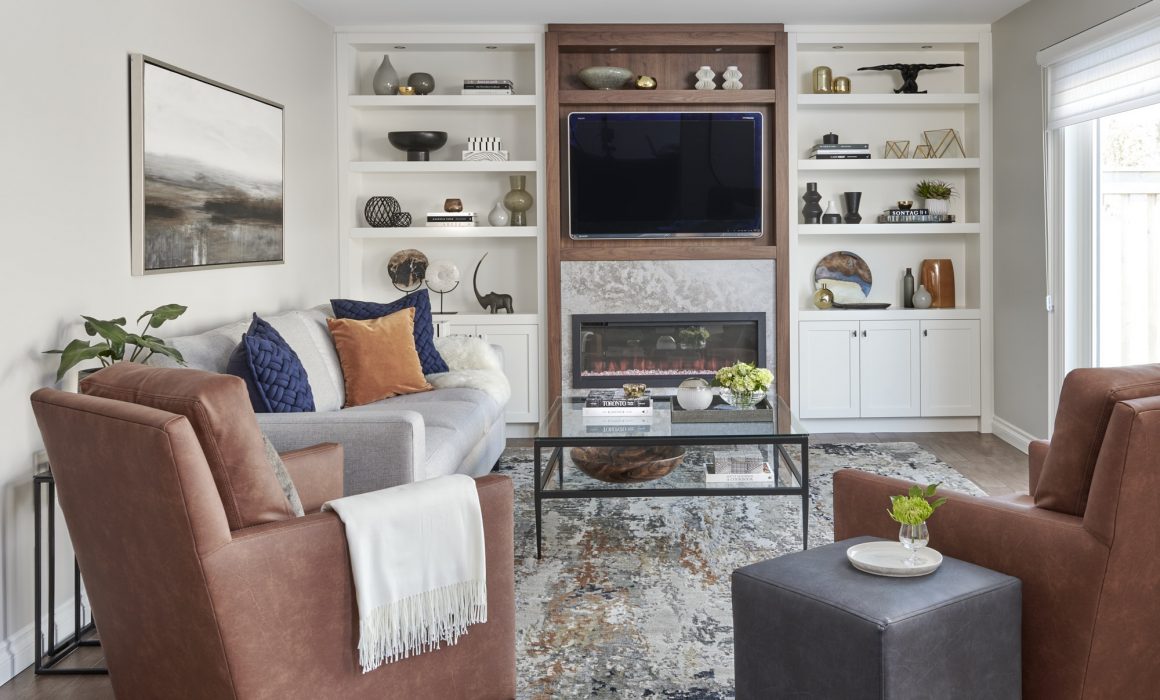
This is the type of heat that you can feel, experienced through physical touch. It’s what entices you to run your hand across the velvet sofa cushions and drape yourself in plush blankets with the rug beneath your bare feet.  Window treatments, rugs, pillows, throws and your furniture upholstery go a long way toward achieving that overall sense of warmth and comfort.

Textiles are often left as an afterthought when designing a room, but I prefer to incorporate them in the greater design plan, as they are an impactful element not to be forgotten. Curtains, rugs, pillows and blankets, and the upholstery you choose for seats, chairs, and your sofa all play an important role in the ambiance. layer different textures to add depth to the design. If warmth is important to you, textiles could be something that is worth splurging on.

Fireplace Focus: For obvious reasons, the fireplace is a natural focal point in any room, whether appealing to an audience with its crackling flames or as a display space for art and accessories. Allow your fireplace to be the centre of attention, and if you do not have one, get one. Depending on your budget and the desired look and feel, you have many options available to you: wood-burning, gas, electric, and Dimplex even offers a water vapor fireplace that is safe, versatile, vent-free and more affordable than its wood or gas counterparts.

#2 Perceived Warmth

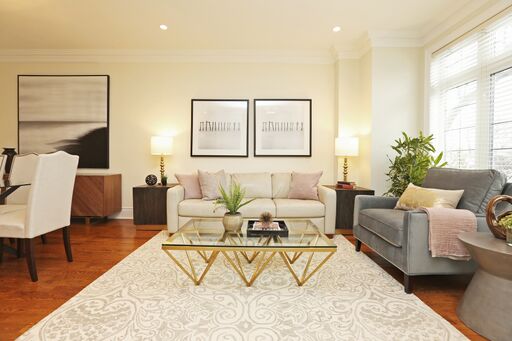
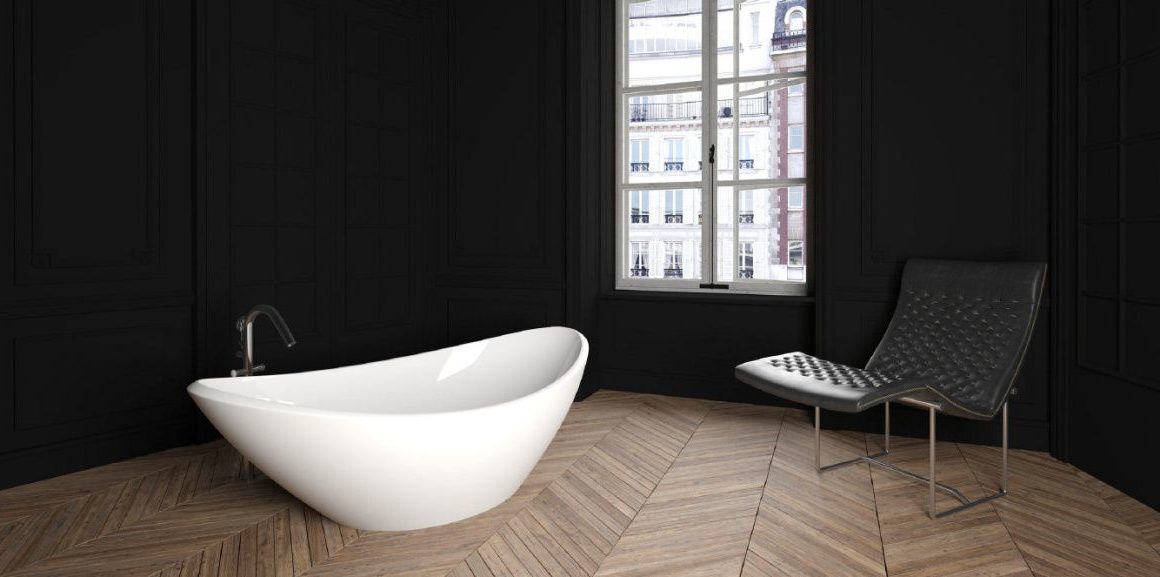
This is the type of warmth that you experience visually. When you enter a room, you immediately get a sense of its “temperature” based on what you can see. Is it soft and organic? Crisp and contemporary? Maybe it is antique and storied. when choosing your home’s overall aesthetic, be mindful of how different styles impact your emotions. Regardless of the style you choose, visual warmth can be achieved by layering different patterns, textures, materials, and finishes. Remember: variety brings interest and keeps the eye engaged.

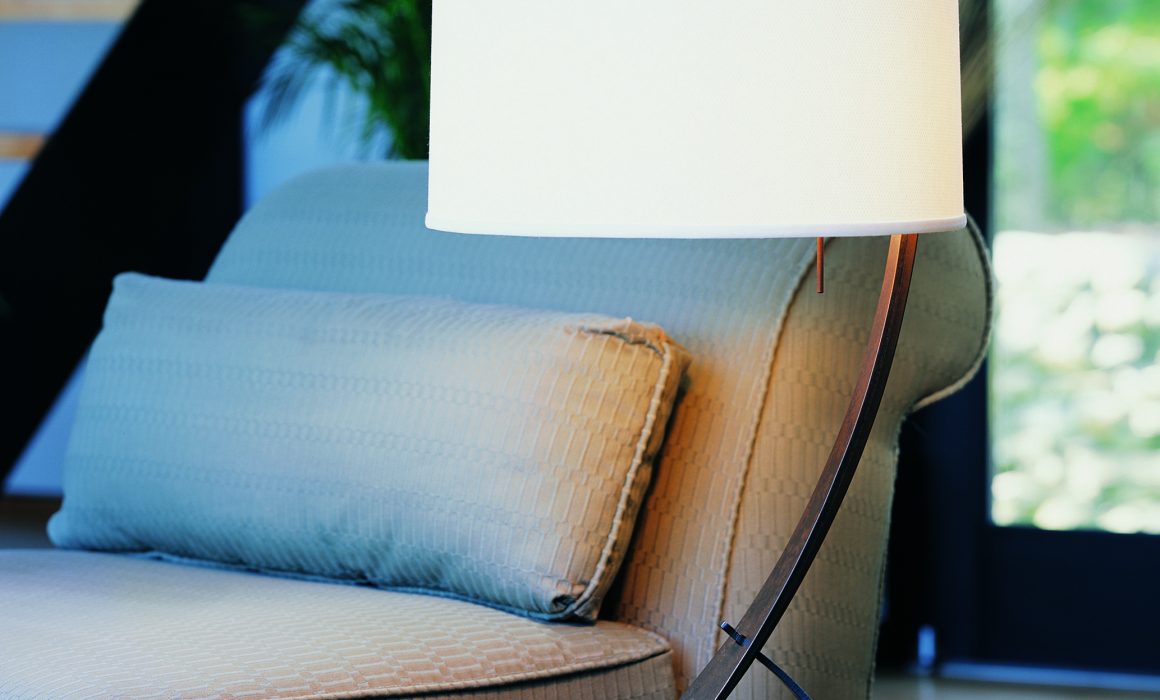
Also consider “lighting temperature.” Light bulbs come in a variety of tints that can set the tone for the

space, ranging from cool bluish-white to warm-yellow that mimics candlelight and neutral “daylight” options. Consider what you will be doing in the room, and what type of lighting will best accommodate those actions. After all, function must come first. Will you be dining and relaxing? Reading and doing paperwork? Watching movies? Warm light is commonly used in residential applications like living areas, bedrooms, kitchens, dining rooms, etc. On the other hand, cool light is ideal for workspaces such as an office, hobby, or laundry room. Ensure a consistent light temperature in the room and put your lights on dimmers to keep it versatile.

#3 Emotional Warmth

This is the warmth that is felt within; the kind that tugs at your heartstrings. A thoughtful medley of art, accessories and the small details can collectively tell the story of your past, your travels and your passions. In short, this is the personality of your home.

Warm up the mood of your space by putting yourself on display. Here is your chance to unpack those mementos from the past and integrate them into your present. Collections, books, photographs, and art all help tell your story and turn an empty room into a reflection of its inhabitant.

“Home” means something different to everyone, and while these tips are a good general guideline, they will be interpreted and realized differently by everyone. there is no right or wrong way to turn a house into a home. If it feels right to you, that is the most important thing.


4 Tips for Surviving The Reno

Although you might think reno season starts in spring, you might be surprised to learn that we in the design world are already well into it. Anyone who’s ever endured a home renovation knows that planning and preparation are key. If a renovation project is been looming and you think you might finally be ready to go for it, here are four pieces of advice to kick your project off on the right foot.

1. Where will you see the best ROI? A renovation is usually the outcome triggered by one of two things – you’re selling your home, or you’ll be living in it. Regardless of your motive, always keep your eyes on the prize and identify the renovations that will yield the best return on your investment. Kitchens, bathrooms and hardwood flooring come with a hefty price tag, but they also offer the best returns. Alternately, some quick and cost-effective upgrades include a fresh coat of paint, re-facing cabinetry, new hardware and lighting.

2. The best projects aren’t necessarily the most exciting ones. This is where you need to separate your needs from your wants. Are there obvious issues with your home that need to be fixed? These projects should always be prioritized over the “extras.” Moisture issues, outdated electrical and plumbing, a ragged roof – these may not give you the same “instant gratification” as a shiny new kitchen might, but most homeowners and designers will agree on this one – it’s a top priority.

3. Have a budget, stick to it. Home renovation spending has a tendency to run amok. There can be a number of possible reasons for this – poor planning, indecision, and those inevitable surprises that come to light once the walls are opened up. Always have a 10- to 15-per-cent buffer budget, to cover any unexpected expenses. Some homeowners might also opt to take the road less travelled (also known as “DIY”) in the interest of saving a few bucks. I always recommend working with an experienced professional, who will get the job done right the first time. Otherwise, you could end up paying twice to have faulty work corrected later.

4. Book your trades well in advance. The construction and renovation industry has two seasons: slow and “whirlwind.” Ensure you engage your professional tea, early on in the process, to give them plenty of notice to line up any sub-trades and ensure your project materials are ordered and delivered on time. Depending on where you’re located, the time of year and what’s happening in the housing market (i.e. a seller’s market can mean a busier-than-normal reno season), your wait for your preferred contractor could be from six months to a year.

A home renovation comes with a whirlwind of emotions: excitement, frustration, anticipation, and some stress thrown in for good measure. By working with a pro, you can minimize the negative feelings and make the most of your project, your budget and your space!


Key Tips When Working with a Designer

There are many great reasons people choose to work with a professional designer, including their keen eye for style, their knowledge of suppliers and trades, and their hands-on experience. As you ask yourself questions like “How do I start the project?” “Who do use to complete the work?” and “Will I love the result?” you can rest easy knowing that your designer already has the answers. If you’re considering working with a designer like myself, I encourage you to follow my tips to make the most of your designer-client partnership.

Read the fine print. Before work begins, the designer will share a letter of agreement detailing their fee structure. Let’s be honest, when it comes to contracts, most people just skip to the last page and sign on the dotted line without reading through. Read the contract completely, and ensure you understand what is and isn’t included in the price. All designers work differently and there’s no “standard” paperwork. Being clear on your expectations and the designer’s deliverables from the onset minimizes future misunderstandings.

Be prepared for the consultation meeting. While not being prepared is certainly an annoyance to the designer, it’s really to your own detriment. You’ll likely pay a consultation fee, so make the most of this time by coming prepared with a list of goals, question and ideas.  Think ahead about your style preferences. Also consider your functional requirements. What’s not working for you currently?

Share images of spaces that evoke a feeling look you admire to help convey further what you are looking for.

Trust your designer’s instincts. Don’t second-guess your designer’s instincts and be open-minded. Each selection has been carefully made to complement the overall design. Perhaps it may seem difficult to envision the final result, but trust us. We know it will all come together beautifully. Changing your mind on something half-way through the process has a ripple effect, and often results in delays and added costs due to design revisions.

Leave the project to the pro. Let your designer do what you’ve hired him or her to do. While you may have good intentions by picking up items to use “in lieu of,” in reality, this can be counter-productive. Your designer has meticulously planned and purchased pieces for your space, and as effortless as these selections may seem, a lot of thought goes into the process. Unplanned additions and changes can be a serious set-back.

Working with a designer can be a game-changer, keeping the team on task, the design on trend, and the project on schedule. Trust in his or her experience and expertise, and remember that this is a partnership. Your input, at the right point in the process, is key. Decorating your home can be tough, largely because it is such a personal thing. A little unbiased professional design input does a long way to having the well-styled and functional home that you desire. Happy decorating!


Design by the Rules

To me, a great living space needs to be more than just stylish. It must be functional, flow seamlessly and most importantly, be functional for how you and your family live everyday. Here’s a few basic design rules to get you there.

Where to begin

Before painting, rearranging furniture and buying accessories, determine what the primary function of the room will be. Spend some time thinking about the purpose of the space. Will your space be primarily for entertaining or filled with children each day? Once you determine the function of the room, draw inspirations from the mood you want to convey in the space.

If you don’t have a natural focal point in your space, such as a fireplace, you can easily create one by simply highlighting a particular piece of furniture, artwork, or by painting a contrasting color on a focal wall. Choose furniture that satisfies the room’s functions. If a certain piece doesn’t work in the space, get rid of it or trade it for something else around the house. Direct the main furniture pieces toward the focal point, and balance the room with pieces of various heights and weights.

Think outside the box

If your space is tight, think outside of the box and consider creating a multi-functional space. An office can easily double as a playroom, and a finished basement can easily double as a guest room when well planned.

Bathrooms can be trickier to design. When we design projects we prefer to choose timeless materials that lean toward durability and longevity. When choosing tiles, faucets and fixtures avoid overly trendy colors and designs.

Best investments pieces

Invest in pieces that you want to keep for the long haul, like a beautiful sofa and storage cases built for longevity. Side tables, lamps and accent pieces are secondary. That said, investing in a quality designer piece can last a lifetime and give your space edge. If you need a little help finding those perfect pieces, call in a professional design firm likes ours to help make your space more beautiful and functional.

Designer Tips:

  • Hang artwork six inches above your sofa and 60 inches to the centerline. Artwork that’s too large to hang consider placing against a wall and use as a focal point.
  • Hang light fixtures 24 to 32 inches above the dining room table — low enough to cast the right light, but high enough not to block views.
  • Choose a rug that’s large enough to slide under the front legs of the sofa and chairs, unifying the furniture.

Table Lamps – For Task, Mood and Decor

When selecting  table lamps for a room, ask yourself the following questions. What is the style of the room? modern or traditional? Are you looking for a table lamp that complements the decor, or adds a decorative element to the space.  Shop for a shade that matches your lighting needs. Some lampshades, made from thick linen or woven material diffuse the light, while others that are more translucent allow the most amount of light to shine. For maximum output choose a shade that is lighter in weight, more translucent and white in color. Additionally, some lamps, depending on the shade, will cast upward or downward beams to provide either mood or task lighting.

Mix and match lampshades, and, if necessary, add a shade riser or extender to the top of the lamp hardware to raise the height of the shade. The bulbs you choose also play a key role in the type of lighting you need. Bulbs differ by the amount of light and color they emit, and the amount of energy they use.  I always check the maximum wattage on a table lamp. Wattage indicates how much power a bulb consumes, not the amount of light, or lumens, it generates. A 40-watt incandescent bulb generates 450 lumens, a 60-watt, 800 lumens and a 100-watt bulb, 1600 lumens. Energy-efficient bulbs yield higher lumens with lower wattage. Two-bulb table lamps are ideal for areas with minimal light sources that require plug in lamps to illuminate the space.

I always emphasize in all my projects that’s it’s not only important to illuminate a space, but also to enhance your room’s decor, Lamps are perfect  standalone piece on an accent table or as an anchor for  a bed or couch, when placed on either side.

Tips:

  1. Task lighting should be free from glare and shadows, and should be bright enough to prevent eyestrain. Make sure that the light is at least 12 to 18 inches from the area requiring light.
  2. Consider the lampshade finial, you don’t want it to be so big that it’s the first thing you see; however, you do want it to make a statement. Remember, the lamp base on a table lamp is the first thing you should notice – the shade and finial should follow.
  3. Consider the overall height and purpose for the side lamp if for reading check where the light is casting down
  4. Consider scale, nothing looks worse than a small lamp with a shade that’s too big or a large lamp with a shade that’s too small.
  5. Buy variety of bulbs and test out which tone of white you prefer in the space.

Size Matters: Some Rules for Choosing Furniture

Furniture – it can make or break a room. The right furnishings have the power to vastly improve a room’s flow and its function, not to mention the overall aesthetic. On the flip side, the wrong furniture proportions can leave your home feeling cramped, cluttered and dark. Here are some helpful tricks of the trade, to help you when it comes to selecting furnishings that are sized to suit your space.

In The Living Room

Seating is the staple in the living room. You’ve simply got to have it. When choosing the seating for your space, consider your focal points. Will you be seated around a fireplace? Window? Entertainment area? Then, look at the room’s overall proportions and echo those measurements in your selections. For instance, sectionals are well-suited to spacious living rooms and open-concept floor plans. On the other hand, a smaller room with high ceilings would work well with a high-backed love seat.

In The Dining Room

The dining table is the center piece of the dining room. Dining tables usually come at a standard height of 28 to 30 inches, accommodating comfortable sitting and eating. However, height isn’t the only factor to consider. The area surrounding the table requires at least 36 inches between the table and wall, to allow diners to pull chairs in and back comfortably.

TIP: Dainty dining area? Consider having a round dining table. Round tables fit well into tight or oddly shaped spaces, and they seat more people.

In The Kitchen:

The kitchen has lot of elements that require accurate measurements – cabinets, tabletop, storage (not to mention recipes!) but probably the most important is your countertop. This is where the daily food pres takes place, so an ergonomically correct counter height is key. The standard is 36 inches in height, but if you’re building a kitchen from scratch then here’s a great opportunity to customize. Here’s a quick trick: place your hands atop the counter. If your elbows bend at a 45-degree angle, then you’ve found the right height.

In The Bedroom:

The bed is the single most important piece of furniture in this room, and arguably in your life. We spend one-third of our lifetime sleeping, so don’t skimp on this piece! Your bed occupies a large area, so proper scale to the space is essential. The bed must be big enough to accommodate you and your bed-mate, and how you both sleep. And to complicate matters further, “big enough” is totally subjective. Height-wise, your bed should sit at least two feet off the floor, give or take depending on your own body proportions. Comfort is key!

In fact, “comfort” should be one of the prevailing motivators when designing your home and buying furniture. The perfect piece of furniture will satisfy your needs in terms of comfort , style and quality. Measure before you shop the market, and while you’re out there, don’t be afraid to try before you buy.  As they say, measure twice and buy once and love it forever.


Choosing the right-sized area rug for your space

I want to purchase a new area rug for our living room. How do I choose the right size? My husband thinks that a five-foot-seven rug under the coffee table is fine but I think that would be too small. I have looked at photos in magazines and have seen it done a few ways. Are there any guidelines I should follow?

Read More


Choosing the best window treatment depends on your purpose for covering them: 50 Shades

We have a very wide window in our bedroom with three separate panes. It’s about 80 inches (203 cm) wide and used to have about 40 inches (102 cm) of space on either side. But we installed a wall of closets to one side that are flush with the wall, which throws the window off centre. Now we can’t figure out coverings for our beautiful window. Should we do a Roman blind, perhaps? Or full-length curtains mounted to the ceiling? But we could only push those to one side given the positioning of the closet — there’s no room for them on that side. What do you recommend?


While hardware for curtains mounted on the ceiling could be installed given the space, the window will definitely appear off. The greater the contrast of the drapery fabric to the wall, the more off balance the window will become. To find the best treatment for your window we need assess the purpose for covering them in the first place.

We dress windows for a number of reasons. Privacy is at the top of the list, and given that this is your bedroom, it’s of foremost consideration. Second to privacy is light control. While having sunlight streaming in through your windows is beautiful, it also has its disadvantages. Sunlight can increase heat (especially in the summer months), the light can make sleep more difficult and the UV light can fade furniture and wood.

When selecting a type of treatment for your window, consider the area around on all four sides. How much wall is to the left and right of the frame? If you were to hang drapery, would there be enough room for the fabric to hang without blocking the view when pulled back on either side? Would anything below the window sill prevent it from closing properly, such as a radiator? Is there room to secure hardware to the wall below the ceiling?

While you have three windows, they are framed as one. My preference would be to treat it as one larger window with an inside mounted treatment. In your case should you decide to do Roman blinds, I’d recommend a blackout liner with a lightweight fabric for ease of operation. Additional mounting brackets at the time of installation will ensure that they last. You will be able to select fabric in a pattern and colour to complement your decor. I’d suggest synthetics as they hold up to the UV much better than cotton or linen.

Cellular shades are another option which are relatively lightweight and offer a variety of light control options from sheer to opaque. Due to the construction of the “honeycomb” cell they provide superior insulating factors in the colder months. Their small size allows them to be placed even in the narrowest of windows with ease. Aesthetically the come in a variety of patterns and colours to suit any style. These shades can be mounted at the either the top or bottom of a window allowing for maximum versatility. You can even opt to have 2-in-1 options — sheer on top and opaque on the bottom.

If you are looking for a design consultation please contact us to book a meeting. 


How to choose the right colour paint for your powder room

I am looking to freshen up our boring all-white powder room. The powder room is pretty small and I’m not sure what to do with it. We have plain white ceramic tiles on the floor and a white pedestal sink and toilet. We are not afraid of colour and are open to all suggestions.

As one of the busiest rooms in the home and frequented by guests, the powder room is often times an afterthought when decorating. Thought of by designers as the jewel box of your home, it needs to have a bit of a wow factor. Averaging four feet by five feet, these tiny rooms tend to intimidate and present some of the biggest design challenges for some. Because of the room’s small size, however, it doesn’t cost as much to make a big impact with bold design statements.

For those who are enamoured with dramatic hues but are hesitant to take the leap, this is a room for you. Although a very important room, we don’t tend to spend a whole lot of time here, and because of this it is the perfect place to let your imagination go wild and experiment with colours you may normally shy away from in main living areas.

Colour can do wonders to make rooms look more spacious. There is a misconception that darker colours make rooms look smaller. Deeper hues can hide hard edges and add drama.

When decorating small spaces our first inclination is to go light — the paler the colour, the more light will be reflected, thus making the space feel larger. The fact is that deeper hues can achieve similar results — although in a different way.

Because of the depth of the colour, the edges of the room are shadowed, less defined and somewhat blurred. This absorption of light makes the walls of the room less marked, giving the illusion of more space.

If you still aren’t convinced, you can have both by installing a chair rail and using a dark and a light colour. If you paint the lower half a dark colour, your toilet and sink will be more prominent, which may not be what you want as a focal point. Painting it white, on the other hand, makes them fade into the woodwork.

For added drama add a decorative finish or stencil a motif. Few powder rooms have the luxury of natural light from a window and will always require a light fixture to be turned on when in use.

If your home is in need of a new powder room, or any other home renovation, please reach out to us.


Fine Finishes - Boutique Design Firm

Fine Finishes Design Inc. is a multi-disciplinary, boutique-style design and decor firm located in Toronto.

We are social

Contact

For information about our services or to book an appointment, contact us via our form HERE or at:
Office: (905) 235-1919

Sign up for our Newsletter HERE

Memberships

Decorators & Designers Association of Canada

Privacy Settings
We use cookies to enhance your experience while using our website. If you are using our Services via a browser you can restrict, block or remove cookies through your web browser settings. We also use content and scripts from third parties that may use tracking technologies. You can selectively provide your consent below to allow such third party embeds. For complete information about the cookies we use, data we collect and how we process them, please check our Privacy Policy
Youtube
Consent to display content from - Youtube
Vimeo
Consent to display content from - Vimeo
Google Maps
Consent to display content from - Google
Skip to content